
A recovery space is the part of your home you go to when you need to come down from the day. This guide covers how to pick the spot, what to put in it, what to skip, and how to set it up without a renovation. By the end you'll have a build order you can start on this weekend.
What you'll learn
- How to choose the right spot in the home you already have
- The five things that decide whether a space feels good or just looks good
- Which gear to buy first, second and last
- What to skip, and why some popular buys sit unused
- A seven-step build you can finish over a weekend
- The mistakes that quietly kill a setup after two weeks
What a Home Recovery Space Actually Is
It's a defined spot with one job: helping you unwind. That's it. The reason it works is separation — your body learns that this corner means the day is winding down.
It isn't a home gym, though it can sit beside one. A gym is where you put energy in. A recovery space is where you let it settle.
And it doesn't have to be a room. Plenty of good setups are a corner of a bedroom, one bay of a garage, a basement alcove, or a covered patio.
Start With How You Want to Feel
Before you look at any gear, finish this sentence: when I leave this space, I want to feel ____.
Three answers come up most often, and each points to a different build.
- Loose. Stiff from work, training or sitting. Your build leans toward heat, a good mat and massage tools.
- Quiet. Mentally wrung out. Your build leans toward sound control, dim light and a seat you can sink into.
- Awake. Flat in the afternoon or sluggish in the morning. Your build leans toward cold water, fresh air and brighter light.
Pick one as your anchor. You can add the others later, but a space built around one clear purpose gets used. A space built around all three usually gets cluttered.
Pick the Room — and Work With What You Have
The spare room
Easiest option. Power, climate and a door that closes are already there. The main risk is drift: a spare room collects boxes, laundry and the exercise bike nobody rides. Decide what the room is and move the rest out.
The garage
The most popular choice and the most forgiving on space. Three things to solve: temperature, floor and sound. Insulate or partition a section, lay rubber or foam flooring, and get some soft material on the walls.
The basement
Good for temperature stability and privacy, and usually the best spot for anything involving water because drainage tends to be nearby. Watch humidity and ceiling height.
A corner of a bedroom
Smallest footprint, and surprisingly effective for a wind-down space. Use a rug, a screen or a shelf unit to mark the edge so it reads as a separate zone rather than furniture.
Outdoors
A patio, deck or side yard works well for cold water and for barrel or cabin-style heat units. Check clearances, weather exposure and whether your setup needs a permit or an electrician where you live.
The Five Layers That Decide How a Space Feels
Gear gets the attention. These five do the work.
- Surface. Something comfortable to sit, lie or stand on. A bench, a lounger, a thick mat. If the surface is bad, nothing else saves the space.
- Light. Dimmable and low, placed below eye level where you can. One warm lamp beats an overhead fixture every time.
- Sound. Either block it or replace it. Heavy curtains, a rug, a door seal, or a small speaker running something steady.
- Temperature. Being slightly too cold is the most common reason people cut a session short. Solve heating and cooling before you buy anything else.
- Air. Ventilation and a window you can crack. Stale air makes a space feel smaller than it is.
Get all five to "fine" before you make any one of them excellent.
Gear That Earns Its Place
Think in three tiers. Work through them in order.
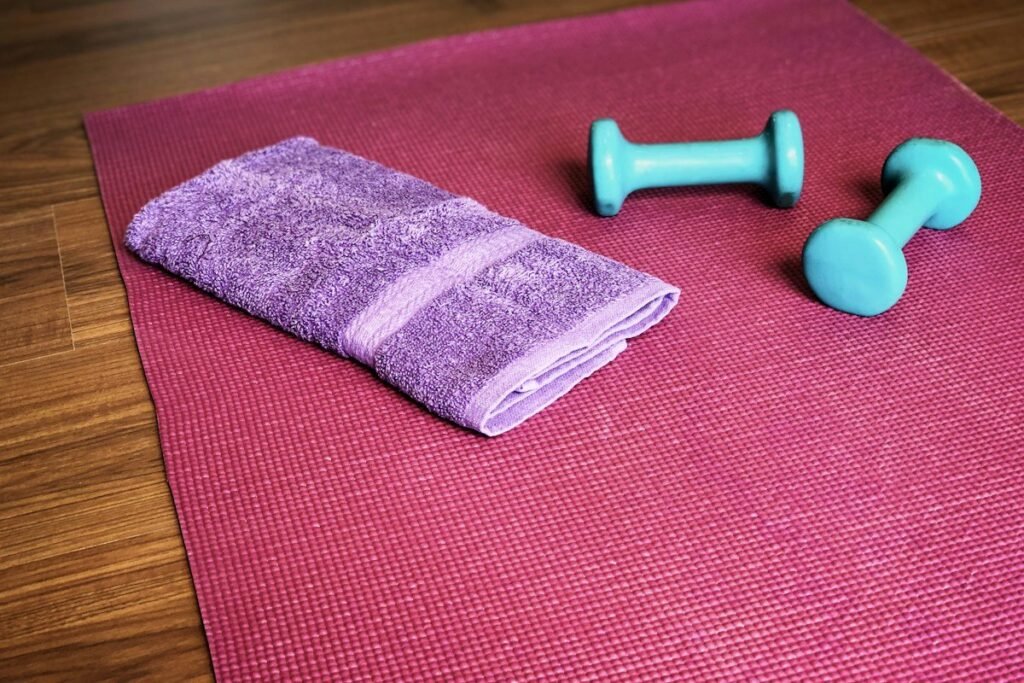
Tier one: the foundation
- A seat or bench you'd happily sit in for twenty minutes
- A mat for the floor
- One dimmable lamp
- A rug and something soft on at least one wall
- Towels, and a hook or shelf to keep them off the floor
- A small speaker or headphones
This tier is cheap, and it's the difference between a space you use and a space you walk past.
Tier two: the step up
- Massage and mobility tools — a roller, a ball, a handheld unit
- A heated pad or blanket
- Compression wear for legs or arms
- A portable cold tub, if cold is your anchor
- Blackout curtains or a sleep mask if wind-down is your anchor
Tier three: the big pieces
- A sauna or steam cabin, indoor or outdoor
- A plumbed or chilled cold tub
- A dedicated recovery chair or lounger
Tier three is where the money goes, so it's the worst place to guess. Spend two or three months in a tier-one and tier-two space first. You'll know exactly which big piece you want by then, and you'll know where it fits.
A note on heat and cold: both are intense, and how your body handles them is individual. If you have a heart condition, high or low blood pressure, are pregnant, or take medication, talk to your doctor before starting either. Nothing in this guide treats or prevents anything — it's about building a space you like being in.
What to Skip
- Anything with a screen you have to look at. Trackers and app-driven devices pull your attention back out of the room.
- A second TV. If the space becomes a viewing room, it stops being a recovery space. Audio is fine; video isn't.
- Full renovation before a trial run. Live with a temporary layout for a month. Furniture moves; plumbing doesn't.
- Five tools that do the same job. One roller you use beats four you rotate through.
- Supplements and gadgets that promise a specific result. Build the space. Judge it by whether you want to go back.
Build It in Seven Steps
- Measure the spot. Length, width, ceiling height, and where the outlets are. Note the door swing.
- Clear it out completely. Everything leaves. Only what has a purpose comes back in.
- Fix the floor. Mat, rug or rubber tile. This is the single biggest change for the money.
- Solve temperature and air. A heater, a fan, a crackable window. Test it at the time of day you plan to use it.
- Set the light. One warm, dimmable source. Kill or cover the overhead.
- Dampen the sound. Rug, curtain, soft wall covering, door seal. Then add audio if you want it.
- Add tier-one gear and use it for two weeks. Change nothing else. Then decide what's missing.
Quick setup checklist
- ☐ Space measured and cleared
- ☐ Comfortable surface in place
- ☐ Floor covered
- ☐ Dimmable light, overhead off
- ☐ Heating or cooling tested at your usual time
- ☐ Window or vent you can open
- ☐ Sound handled
- ☐ Towels and a hook or shelf
- ☐ No screens in the room
- ☐ One clear purpose you can say out loud
Make It a Habit, Not a Project
A space that's finished and unused is the normal failure mode. Two things prevent it.
Attach it to something you already do. Straight after training, straight after work, or the last twenty minutes before bed. The trigger matters more than the schedule.
Keep the barrier to entry at zero. Towel ready, light on one switch, nothing to set up. If using the space takes five minutes of prep, you'll skip it on the days you need it most.
Common Mistakes
Buying the big piece first. A sauna or tub arrives, the surrounding space is still bare concrete and a bad lamp, and the whole thing feels unfinished.
Making it a storage room with a chair in it. Boxes creep back in. Hold the line on what belongs in there.
Overlighting. Bright overhead light keeps you alert, which is the opposite of the point.
Ignoring the floor. Cold, hard flooring ends sessions early and makes everything feel temporary.
No plan for water. Cold tubs and steam need drainage, towels and somewhere for wet gear. Sort that before the first use, not after.
Building it for a version of you that doesn't exist. If you've never stretched for thirty minutes, don't build around it. Build for the person you actually are, then let the space change you.
FAQ
How much space do I actually need for a home recovery space? A corner of about six by six feet is enough to start. That fits a chair or bench, a mat, and a small shelf for a few tools. Larger pieces like a sauna or a tub need their own footprint plus clearance and drainage, so measure before you buy anything big.
What should I buy first for a home recovery setup? Buy comfort and control first: something good to sit or lie on, a dimmable light source, and a way to manage sound. Those three change how the space feels every single day. Heat, cold and massage equipment make more sense once you know you'll actually use the spot.
Can I build a recovery space in a garage? Yes, and garages are one of the most common choices. The three things to solve are temperature, floor and sound. An insulated section, a rubber or foam floor and some soft material on the walls will take a garage corner most of the way there.
Is heat or cold better to start with? That is a matter of personal preference, not a ranking. Most people find heat easier to live with day to day and easier to stay in long enough to relax. Cold is cheaper to set up but harder to stick with. If you have a heart condition, are pregnant, or are on medication, raise either one with your doctor before you start.
How long should I spend in a home recovery space? Short and regular beats long and rare. Ten to twenty minutes most days is enough for the space to earn its place in your week. Build around a time you are already free, like straight after a workout or in the last half hour before bed.
Start With One Corner
Pick the spot, clear it, fix the floor and the light, and give it two weeks. That's a Saturday's work, and it tells you more than a month of research will.
If you want the next guides as they go up — gear breakdowns, garage builds and heat and cold setups — subscribe free and we'll send them to you. You can also browse the Shop to see what we stock, or read more posts on the Blog.